Wednesday, December 31, 2014

Creativity with Crayons

Creativity with Crayons

From my "ArtsyJourneys" blog!


If you think that crayons are just for "coloring" you are partially right! But see what happens when you challenge a teen art class to take simple perspective a few steps beyond the basics and apply what they learned about shading techniques using paper, a pencil and crayons! Wondrous results!


 Shading and highlighting the contour shapes makes the piece seem to undulate on its own!

Crayons, used in this manner, are a simple, cheap and effective art tool for all ages!

Highlights are the white of the paper, uncolored!


Draw the pencil perimeter first, add the contour lines, then enhance with shading

Tuesday, November 18, 2014

Painting the Moon over the River

There is something about painting that soothes the soul-and it works well with the after school teens in my class! I manged to get one photo of their painting "Moon over the River" before the battery died in my camera but their results were lovely!


The teens hard at work!
Working from an example I had propped up, they learned to paint the entire background first then bring their dark trees into the painting-a brave thing for kids already happy with their moons and sunsets! We try hard to get past their fear of "messing it up!"

 closer view of one created in an earlier class

Sunday, September 14, 2014

Art for the kids and the adults!

I'm not sure what happened to the summer but it's gone, schools are in session and I am behind! :-)

The summer camps were fabulous! Lots of kids, lots of activities, lots of outdoor time as well! We studied the fabulous painting "The Berry Pickers" by Winslow Homer and then commenced to pick berries ourselves.  Of course I think his Maine children were picking blueberries whereas we carefully picked blackberries!

"The Berry Pickers" by Winslow Homer
The Berry Pickers with Art Student Academy!


Our after school classes in Wake Forest began Sept 3 and we have classes for 7-10 and 11 up this year. Info is on our site at:  http://www.artstudentacademy.com/After-School-Classes.html

Wed Sept 17 is a super class for all ages where from 6:00-8:00 we'll be painting VanGogh's rendition of Sunflowers!  Of course you can also paint your own rendition.  It's all here:  http://www.artstudentacademy.com/Van-Gogh-Sunflower.html

It should be a GREAT class! Stay tuned :-)


Tuesday, July 22, 2014

So what do you do when it rains at your summer ART Camp?

So what DO you do when it rains at your summer art camp. Well, you get wet! And no one minded!
Because, as it turned out, a little drizzle did not dampen the student's enthusiasm at all!

We gave up on the wet shoes :-)
Eventually we did give up on the wet shoes. "Running the Trails" is like a pressure release valve that is especially effective after classroom concentration! So although the grass is short on the trails, it is wet.
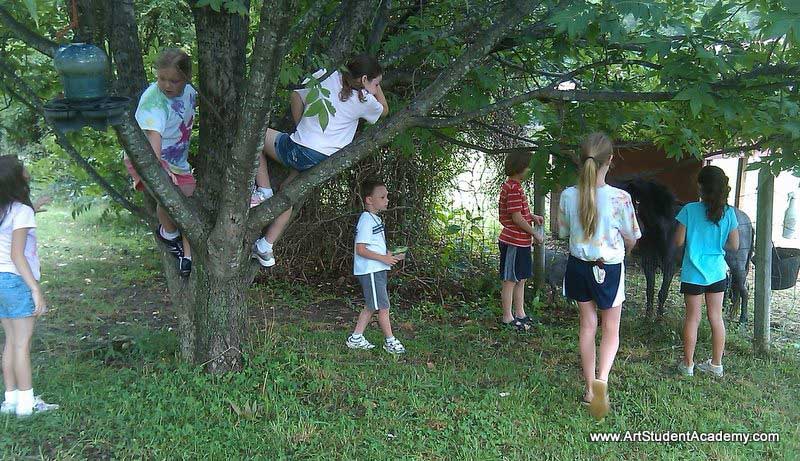
With camp from 9:30-3:30 there is time to do it all without too much of any one thing! The "Secret" trails run through the fenced pasture next to the studio. Cut the width of my riding lawn mower, the trails circle, weave and sneak through the tall brush  and around trees, enter tunnels of growth and lead back to the entrance gate. Games of tag, hide and seek and even stopping for a a few late blackberries are just a few of the possibilities in the kids' minds! The popular climbing trees turned out to be too wet to effectively climb but oh the fascination of tadpoles, ponies, dogs and chickens-all treats after creating their beautiful art pieces!

A few examples below are from Day 1! Summer camps are held at our professional art studio just north of Wake Forest outside Franklinton, (NC.:-))

Our popular After School are programs are held in downtown Wake Forest and begin September 3, 2014! Just $50.00 a month! http://www.artstudentacademy.com/After-School-Classes.html


Blind pony "Helen" getting her share of attention!

Catch and release tadpole hunting

Lunchtime indoors during one downpour!

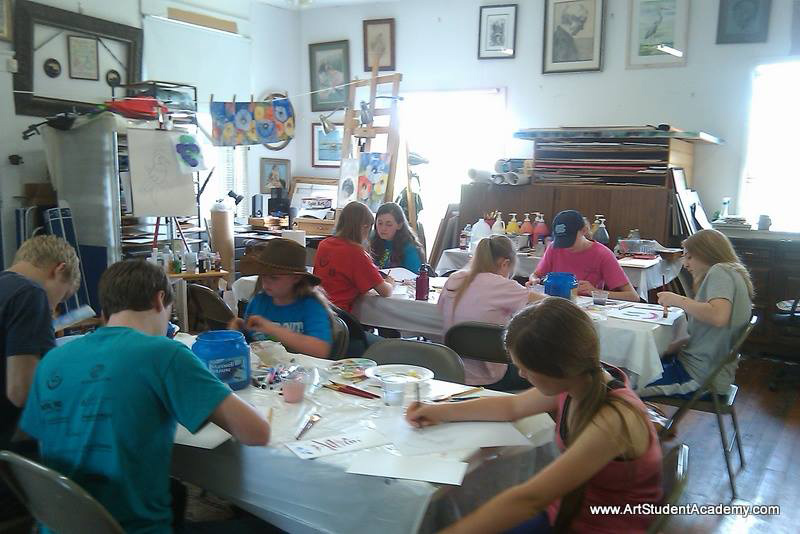
A few of the 14 participants showing their foray into modern art!


Saturday, July 19, 2014

Art Camp in the country!

With 2 art camps tucked under our belt, the 3rd (and last one) begins next week!
My July21-23 became filled so I opened an earlier one from July 7-9. Even with the 4th being on our heels, 10 kids had a ball. That group, along with the June group had the fun of picking blackberries along the secret nature trails. Next week's camp won't be able to collect bags full but they'll be able to pick and eat!


What these camps do is give a number of our students the opportunities to experience a new kind of art camp. They are doing plenty of painting and sculpting but when was the last time you told your child, "Just run outside and play?" :-) The secret paths all lead back to one area and when the kids need that break from art, I tell them "Go run the trails!" And off they go.

Helen and Shadow, the two ponies are a favorite. Helen is blind so we bring her out to be groomed and get her share of the treats! 

And of course let's not forget all 5 dogs-yep-DaVinci, Gizmo, Rosie, Troop and Louie! Enjoy the photo collages below of random art scenes from the first 2 camps!


Wednesday, June 11, 2014

3 day ART camps rock!

OK, it's official! The most popular art camp days turned out to be the 3 day, all day camps so if you are between the ages of 7-15, love to paint and sculpt and love animals, then this is the camp for you! 
http://www.artstudentacademy.com/Summer-Program.html

June 16-18 and July 21-23 from 9:30-3:30! 


Wednesday, April 30, 2014

2014 SUMMER ART CAMPS in the COUNTRY!

art camp
We offer 3 opportunities this year for our ARTESCAPE Summer Art Camps! This year, 2014, we will be at our Franklinton area ART studio which is in the country. Our 3 and 5 days camps offer agreat opportunity for children to explore different mediums and experiment with techniques by learning about different styles to create paintings, sculpture and mixed media designs. They are divided into half days and ages.
Our mini farm consists of ponies, chickens, friendly dogs and assorted gardens so your child's art experience is indeed an ARTESCAPE :-)art camp tree
Complete details about what to wear, bring, child drop off and pick up times, snacks, etc are included in the welcome email and release forms that all parents receive. 5 days of total artimmersion!
New Option - If your child would like to participate in any of the 3 sessions but the distance is inconvenient for the half day session, we offer a 3 day, full day option form 9:30 - 3:30 Monday - wednesday. You child will participate in both sessions regardless of age and will finish ahead of the half day sessions :-)  Because there is an additional half day session involved cost is $135 with 15% discount for siblings. Bring a lunch, drink a snack. Water always available!
Summer 2014 ARTESCAPE schedule:
CAMP 1: June 9-13
  • Ages 7-10 9:30-12:00 $115.00
  • Ages 11-15, 1:00 3:30 $115.00
  • All ages, June 9 - 11, 9:30-3:30 $135.00  15% discount for siblings
CAMP 2: June 16-20
  • Ages 7-10 9:30-12:00 $115.00
  • Ages 11-15, 1:00 3:30 $115.00
  • All ages, June 16 - 18, 9:30-3:30 $135.00   15% discount for siblings
Camp 3: July 21-25
  • Ages 7-10 9:30-12:00 $115.00
  • Ages 11-15, 1:00 3:30 $115.00
  • All ages, July 21 - 23, 9:30-3:30 $135.00   15% discount for siblings
Please fill out the online form for each student, then click the Add to Cart button to pay $50. per child pre-registration deposit:  http://www.artstudentacademy.com/Summer-Program.html

Saturday, April 12, 2014

Sketching with Live Models Outdoors

Sometimes you just have to take your art outdoors! 
Artists have worked on location for centuries and painting outdoors "plein air painting" is a time honored tradition.
Art is not just about creating art-it is about experiencing it. And nothing will do that better than for an artist to sit outside and sketch or paint a subject. In our line of work, Stephen Filarsky especially, works in oils at his easel. It is not unusual for minute particles of his surroundings to lodge in his wet oil painting yet often he leaves them in the painting. Why? They are part of the experience. Part of the red clay from Georgia or sand from the beach or grass from Kentucky. You won't see them, but nonetheless they are part of his experience, his day and that painting!  

So we took that a step further recently and drove to Grammercy Christian School in Newport, NC where we held two workshops for the students using live models! It is Also something we will be doing in our summer art camps with the kids!

Summer camps here: 
http://www.artstudentacademy.com/Summer-Program.html

Wednesday, April 9, 2014

Sculpting with clay!

So who doesn't love clay? From play-doh to sculpey to the potters wheel there is something pretty timeless about clay! It appeals to ALL ages!
Clay helps develop fine motor skills!


We started back in February with clay reliefs and the results were adorable! Then we were walloped with snow days and finally, as the weather broke, we were able to devote the time we needed to building armatures, wrapping the wire and finally applying the sheets of thin clay over the armatures. 

This week we'll be finishing the sculpting, painting and firing the pieces.  Take a look at the few pieces and be impressed! Remember-These are their FIRST sculptures!

Collage of process!
The process

works in progress
We'll be doing more, but with animals, in our summer art camps this June and July! These will be held at our mini-farm north of Wake Forest and all details and information can be found here at the link at the bottom of the page!
http://www.artstudentacademy.com/Summer-Program.html

Wednesday, March 5, 2014

Easy Drawing Tip: Use a Grid!

There are times I would like to shake whichever art teacher came up with the sentence "copying is cheating" decades ago because I hear it SO many times from ages 4 to 94. It is a terribly unfortunate statement that has stopped many a beginner from progressing because some well meaning but uninformed person (who uses the latest of updated technologies) repeats that demoralizing sentence!

Some artists, and I am one, can look at anything and redraw it on paper. But I still need a reference :-) And those that "pull from their minds" also need a reference. I love to ask people if they know what an elephant looks like. And everyone says "yes." Good. So then I ask them to draw an elephant and this is where the fun begins. The subject quite honestly can be anything. The point is, in order for it to look like what we want it to, we need to have seen and handled (regularly) the subject or look at references. Only then can an artist "pull from" his imagination whether realistic, cartoonish or a monster!

So with all that in mind, a blog, the Frugal Crafter, whom I follow, posted a great little tutorial on "graphing"-the ability to take a smaller (or larger) photo, drawing or sketch and enlarge it onto a surface  the artist wishes to paint on.  The usage of a grid goes back centuries! There are woodcuts by the artist Albrecht Duhrer (1471-1528) depicting an arrtist using a grid to learn to draw and see properly. I like to encourage the students of all ages to draw on scratch paper THEN transfer their image to the canvas or paper. Having the ability to enlarge drawing makes the possibilities endless!

I am going to try to post in verbatim here and try to go back and add the links as I have permission to share! The title link will also take you right to the blog! Enjoy!


Easy Drawing Tip: Use a Grid!

 I had an “Ask a Crafter” question from a lady who wanted some ideas on how to re-size drawings, she had thought about a projector but she wanted to know if I had any ideas. I thought this questions would be better explained in it’s own video so here it is:

The best thing about this technique is anybody can do it, even if you say you can’t draw a strait line you can do this and it will look very close to the original because you are just copying lines in a small box.  I got a great tip from a YouTube viewer who suggested that I cover the squares I was not working on to trick my brain into not looking ahead, great idea, you could cut a square the same size as the grid and lay it on top and shift as needed. I also heard from a math teacher who cuts up coloring pages and has the kids draw the contents of the square on a larger paper and they the class put the “puzzle” together. Ain’t learnin’ fun!?! This is a good exercise for me because I have drawn for so long that I start with the basic shapes then start refining but if I’m not careful I just make it up and stop looking at my reference so this makes me really look.
Before I forget, here is the link for the printable graph paper. I used a 1/2″ grid in black for my transparent sheet. I drew my picture on a 1″ grid therefore doubling the size. You can make the drawing grid as big as you like, and make it however large you want. It’s really like designing a vector…hmmm, maybe that is why it is good for math teachers, and art teachers, let’s cross curriculum this technique!
I hope you found this useful, teach it to yourself and your kids! thanks for stopping by and til next time happy crafting!


Sunday, February 9, 2014

What our Children's ART classes are up to! Clay, design and painting!

We have a talented group of kids in our "after school" programs and they have explored sculpture, clay, design and more recently-abstract design!
Our clay work, so far, has been working in relief and from the few examples below you can see how creative their work is!

 We are not finished in clay! We will be using hand tools to build our own armatures to make 3 dimensional sculptures. It's a great way to learn about hand tools such as pliers and wire cutters and how to balance their piece, add clay and then paint. A super cool project!


Snowy weather didn't slow us down this past week! Enjoy the collage below (I have more coming) of the "Abstract Tree". It's a fabulous painting exercise in going right to the canvas with no pencils, no erasers...just pure imagination. There are pretty much no rules in this one so it's also an excellent exercise for them to show other family members :-)
We'll continue painting the week of Feb 10-15!
One group
another group of paintings!
Stay tuned for examples of the adult class taught by Stephen Filarsky Feb 1-Drawing Trees from life. Amazing!

Friday, January 10, 2014

Toothpicks and Marshmallows and Tinker Toys sculpture

What imaginations my students had this week!

The after school kids in Art Student Academy had to put on their thinking caps because sculpture is not just clay! It's the basic building block of everything from practical buildings to works of art.
Many an engineer started their careers with Tinker Toys and Erector Sets!
Building from the basics
Sculpture is one of the few art forms that combines so many elements! The kids (ages 5-15) did just that in combining Math, geometry, structure, design, history and plain common sense to create some amazing 3D sculptures and they did it all in just an hour. Think what they could create on a rainy afternoon at home with these inexpensive items!

What we did:
After a discussion and demonstration about which was stronger-a pyramid or a square (50% got the right answer-a pyramid!) we went over the take home sheet of basic geometric shapes of square, triangles, etc. to more complex forms such as octahedron, pentagram and tesseract. Students learned that every building, stairway, bridge, in fact every man-made structure they see going down the road or in their house started with a simple basic shape. And the basic shape could grow and grow but not unless it was structurally sound! Learning about reinforcement for instance is important knowledge to keep walls from falling over when they get into  slab clay structures next week.
The very cool thing about using the miniature marshmallows instead of self hardening clay is that the marshmallows, in less than 24 hours, harden to a rock hard consistency.  These same, very cool structures can then be spray painted with a glossy or matte spray paint and hung from ceilings or set on tables. The possibilities and the results are infinitesimal!

We started with the basic shapes and went from there!

The students all started with the basic building blocks of cube, pyramid and (tada) octahedron (diamond). From there they were allowed free rein to go in any direction they wished. It did not take long for them to see the importance of reinforcement and practical design :-)

Exercises such as these are part of the hands on knowledge that all children excel in. They learn best by doing. They retain that by practice. Give them a bag of miniatures marshmallows and round toothpicks, step back and watch what happens!


Expanding a basic pyramid

Marshmallows are flexible, eventually rock hard and yummy!

An even more complex creation

Even the youngest were intrigued!


She just got totally involved and would have kept going!